Hey there! Got an image that needs splitting and not sure where to start? Microsoft
PowerPoint's got your back! In this guide, we'll walk you through the nitty-gritty of
slicing up an image in Microsoft PowerPoint, making it as easy as pie.
First things first, fire up your Microsoft PowerPoint.
Step 1: Open Your Image
Let's kick things off by getting your image into Microsoft PowerPoint. Head to the top
of the app and find the Insert tab. Give a click on Pictures.
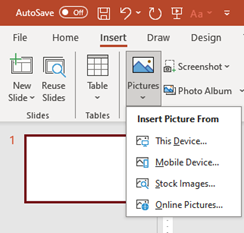
Now, you've got choices for where to snag your image from. Grab it from your PC's
folders with This Device..., dip into Microsoft PowerPoint's own photo library with
Stock Images..., or pull something fresh off the web with Online Pictures...
Pick the image you want, and presto! It'll pop up in your active slideshow.

Step 2: Crop Your Image
With your image now in the slideshow, it's time to get down to the business of
splitting it!
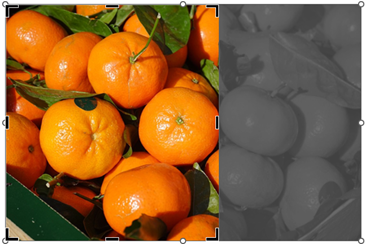
Select your image, then mosey on over to the Picture Format tab.

Next up, hit Crop. For our example, we're splitting our image into two, so you'll want to
crop half of it.
After you've cropped your image, copy and paste it into another document. And hey,
this can be in a different app, not just Microsoft PowerPoint.

Now, scoot back to your original Microsoft PowerPoint document with your image, and
hit the Undo button. You can also use the old faithful Ctrl+Z shortcut.

Do the same dance again, cropping the other half of the image this time. Repeat this
step as many times as needed to get all the pieces of your image.
And there you have it, you're now a pro at splitting images in Microsoft PowerPoint!
For more PowerPoint tips, check out our courses right here! 👇
Stay tuned for more tips!
📞 Contact us:
📧 Email: support@dileap.com
Follow Us on LinkedIn for the latest scoop!